DIY Solar Panel Tutorial: Building Your Own Solar Panel at Home
Learn to harness solar power by building your own solar panel. Follow our step-by-step DIY solar panel tutorial for an eco-friendly energy solution.
Energy costs are on the rise, making the search for affordable, sustainable options critical. Many homes in the U.S. can’t have rooftop solar panels. This makes the need for flexible solutions clear. Fenice Energy offers a detailed DIY solar panel guide. They use their clean energy experience to help you go green and save money.
This guide on making your own solar panel will show you how to build one. You’ll learn to craft a solar panel that’s both personal and good for the planet. The guide explains the easy steps and the complicated bits of making a solar power source.
Key Takeaways
- Solar panels cost an average of INR 1,28,975 for a typical 5 kW system, with DIY potentially cutting costs significantly.
- Adopting a homemade solar panel can save money on electric bills over time, especially with panels reaching up to 22% efficiency.
- Fenice Energy’s tutorial provides a step-by-step guide tailored to help you achieve successful solar panel construction.
- Community/shared solar programs and Solarize campaigns are viable alternatives for those unable to install their panels.
- Exploring financing options like solar leases or Power Purchase Agreements (PPAs) could lead to substantial savings…
Introduction to DIY Solar Panels
Fenice Energy highlights the importance of going green with energy. They show that using solar power is vital for our future. With the solar panel step-by-step guide, it’s easier for Indian homeowners to get into DIY solar power. This is key as almost half of U.S. homes can’t install rooftop panels due to rent or roof issues.
Fenice Energy wants to help people make their solar panels. This move is good for the planet and can save money. While buying solar systems has its perks, many prefer affordable options like leases or PPAs. These options can cost less than regular electric bills each month.
Programs like Solarize make solar more accessible through group deals. Homeowners can also do energy audits to find where they lose energy. Making homes more efficient, like using LED lights or improving insulation, works well with solar energy.
The need to shift to renewable energy is urgent when we look at global stats. For example, the world used 17.4 TW of energy in 2015, and it’s expected to rise by 56% by 2040. But, solar energy use is still under 5%. Countries like Germany aim to fully switch to solar by 2050, showing we need to act fast.
The dangers of sticking with fossil fuels are clear, like acid rain and air pollution. Yet, a home solar system can greatly reduce carbon emissions. This shows the power of solar in building a sustainable future.
In conclusion, making solar panels at home is not just rewarding. It’s a critical step towards a healthier planet. Fenice Energy provides all the knowledge needed to start this eco-friendly project at home.
The Advantages of Building Your Own Solar Panels
More and more homeowners are choosing to make their own solar panels. These homemade systems are not just cheaper. They also bring benefits that go beyond saving money.
Economic Savings
Building your solar panels can save you a lot of money. With tips on building them cheaply and a federal tax credit, you can save a lot. This tax credit lets you deduct 30% of your solar system’s cost. The average solar setup costs about $18,000 before these incentives. People usually start saving money after 6 to 10 years compared to regular energy costs.
Customization and Personal Fulfillment
Making your solar panels lets you tailor your energy solutions. It works whether you have a big house or a small one. You get to improve your technical skills and feel proud of your work. This sense of achievement comes from making a functional unit by yourself.
Environmental Impact
Homemade solar panels are good for our planet. They help lessen our carbon footprint and make the environment healthier. These panels pay back their environmental cost in 1 to 4 years. They also work in various climates and last between 25 to 30 years. Building your panels is thus a durable eco-friendly project.
| Aspect | Detail | Benefit |
|---|---|---|
| Cost Efficiency | Average complete home setup costs $18,000 before incentives | Long-term savings and a lower average monthly cost compared to utility bills |
| Investment Returns | Break-even within 6-10 years | Increases home value by 4%, savings on electrical bills resonate in property value |
| Customization | Tailor the system based on energy needs and house specifications | Personal fulfillment and functionality |
| Environmental Impact | Offsets greenhouse emissions in 1-4 years, lasts 25-30 years | Promotes sustainability and reduces carbon footprint |
Fenice Energy helps homeowners get into solar panels. They offer expert advice. Joining this movement means you’re choosing cleaner, responsible energy. Making your solar panels is rewarding in many ways, from saving money to helping the planet.
Essential Solar Panel Materials and Tools
Starting a DIY solar panel project requires knowing about solar panel materials and tools. For DIY solar enthusiasts, it’s important to understand the basic components and tools needed. Crystalline silicon is the most used material in solar panels worldwide, making up 95% of the solar market in 2021. With advancements in solar technology, several key materials have become crucial for successful solar panel assembly.
Whether it’s a small home project with Fenice Energy’s help or a larger solar setup, you’ll need good solar cells, strong frames, dependable electrical wiring, and connectors. Polysilicon production is key for making these solar cells and involves using reactive gases like hydrogen and chlorine. The pure silicon is made into cylindrical ingots with the Czochralski process, then sliced into thin wafers. These wafers are turned into solar cells, which are vital for the panel’s overall efficiency.
New technologies like AC modules and smart modules bring features such as panel-level power tracking and better safety. This progress is partly due to collaborations between solar panel and micro-inverter companies. Precision tools like soldering irons, epoxy sealants, and electrical testing devices are essential for assembling these advanced modules safely and correctly.
Thin-film technologies, though less common, use materials like CdTe, CIGS, and a-Si. These are layered onto substrates such as glass or metal. This process requires a different set of DIY tools for assembly. Enhanced assembly options include ground-mounted steel racking and varied racking solutions for different roof types. These show the customized approach needed for solar panel construction.
Power electronics are crucial as they change the DC electricity from PV panels into AC electricity for home use. These components are carefully put together on electronic circuit boards. This showcases the detail and precision needed in making solar energy systems.
To help DIY enthusiasts, here’s a basic list of solar panel construction materials and tools:
- Solar Cells (Preferably Crystalline Silicon)
- Electrical wiring and Connectors
- Busbars for Electrical Connection
- Soldering Iron and Epoxy for Cell Attachment
- Plywood and Cardboard for Template Creation
- Tile Spacers for Array Layout Precision
The list of materials and tools for assembling solar panels is large but manageable. For DIY solar fans or professionals like Fenice Energy, having the right tools and knowledge is key to successfully building solar panels.
Pre-Construction Planning and Safety Tips
Before starting with solar panels, knowing the basics of solar power is essential. It’s important to understand how solar energy conversion works. Solar panels turn sunlight into electricity, a key part of using renewable energy at home.
Understanding Solar Power Basics
Using solar energy seems complex at first. But with guidance from experts like Fenice Energy, beginners can learn quickly. These systems provide clean power and help us rely less on fossil fuels.
Solar Cell Layout and Orientation
Planning your solar panel setup involves thinking about the cell number and direction. This ensures you get the most sunlight for energy. The right setup, following NREL’s average system size, fits most homes perfectly.
Safety Precautions and Gear
It’s crucial to install solar panels safely. Wearing the right safety gear is a must. Fenice Energy stresses following safety tips to avoid accidents, especially when high up or with electrical parts.
| Consideration | Description |
|---|---|
| Solar Power Tax Credits | The ITC provides a 26% tax credit for systems installed between 2020-2022 and 22% for 2023 installations. |
| Energy Efficiency Upgrades | Complementing solar panels with energy-efficient appliances reduces overall home energy requirements. |
| Home Value Increase | Investment in solar energy systems is akin to other home upgrades, augmenting property value and marketability. |
| Safety Regulations | Adherence to building codes and safety regulations, like edge protection and control measures, ensure installer well-being. |
Solar panels do more than produce clean energy. They are a good addition to any home. Thanks to the Solar Investment Tax Credit and other aids, solar is a wise choice. Check out DSIRE for more details on these benefits.
Adding solar panels can also boost your home’s value. It’s similar to updating your kitchen or basement. Aiming for solar-ready homes makes energy efficiency easier. Plus, following expert construction advice improves system performance and lowers costs.
Designing Your Solar Panel Template
Starting to build a DIY solar panel foundation means creating a detailed template. This template is vital for the solar setup’s strength and power-gathering ability. Paying close attention to the backing board design and solar panel frame construction is key. These parts hold up the structure and help collect solar energy well.
Creating a Frame and Backing Board
The frame shapes your solar panel. A strong frame keeps the panel secure and stops it from bending or getting damaged by weather. For the backing board design, pick materials that do well in India’s climate. This helps your solar panel last longer against temperature changes and moisture.
Choose sturdy materials like aluminum or treated wood for the frame. These materials fight rust, corrosion, or decay. It makes your solar panel a smart long-term choice. Fenice Energy suggests using resources that save money and are sustainable.
Positioning Solar Cells and Making Connections
After setting up a strong base, place the solar cells smartly. They should catch as much sun as possible and be securely attached to the backing board. Use tabbing wires to solder the cells together. The solar panel electrical design is important for determining the panel’s voltage and current, which decides its power output.
Bus wires help connect the cell strings, keeping the solar panel’s energy-saving feature intact. Your organized cells show the clever science behind a DIY project, whether for home use or a bigger eco-friendly goal.
Here’s a quick look at what makes a solar panel work well:
| Component | Function | Significance |
|---|---|---|
| Frame | Supports entire structure | Prevents obstruction of sunlight |
| Backing Board | Holds solar cells | Base for attaching cells |
| Tabbing Wires | Series connection of cells | Facilitates electrical flow |
A solar panel’s power, where Power (Watts) = Voltage (Volts) x Current (Amperes), showcases the engineering behind solar panel frame construction. Whether making a small unit or a large setup, consistent performance proves your design and connections are precise.
Following these steps lets you make a trustworthy DIY solar panel foundation. Fenice Energy backs DIY projects, showing how much good craftsmanship and solar power matter. By soldering each wire and building each frame, you move closer to using renewable energy. This effort helps make India greener.
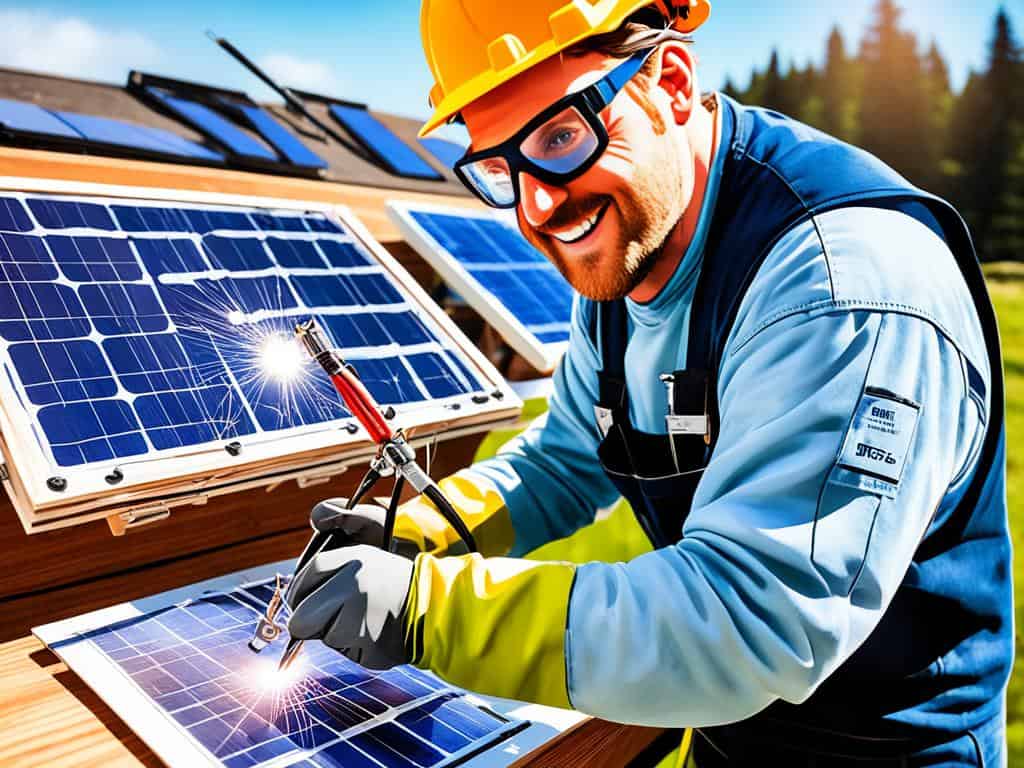
How to Make a Solar Panel: Assembling the Solar Cells
Starting to make a solar panel means first assembling the solar cells. This step is the core of building a system that can produce clean energy. It is crucial, whether you’re doing it by yourself or with a guide.
Putting the solar cells together involves connecting wires to them. You need to solder these wires correctly to make strings of cells. This setup is vital for the electricity to flow right and power places like your home or business.
- Start by soldering tabbing wires to the individual solar cells.
- Delicately connect these cells in series to form strings, being careful to maintain the right polarity.
- Join the strings together using bus wire, forming a long concatenated series that forms the solar panel itself.
At Fenice Energy, we focus on making solar panels that last long and perform well. We secure the solar cells with silicon on a pegboard. This method prepares a solar panel to last for years.
| Component | Description | Lifespan | Efficiency |
|---|---|---|---|
| Crystalline Silicon PV cells | Mainstay of solar cell industry; utilized in most commercially available modules | 25+ years | Efficiency can remain over 80% of original power output after 25 years |
| Thin Film PV modules | Processed as single units; alternative to crystalline silicon | Varies | Generally less efficient than crystalline silicon; longevity can be less |
| Multijunction Solar Cells | Multiple layers to capture various wavelengths of solar spectrum | Used primarily in space applications | Efficiencies higher than 45% |
| Perovskite Solar Cells | Emerging technology with significant efficiency improvements | Must achieve 20-year outdoor stability for commercial viability | Increased from 3% (2009) to over 25% (2020) |
The process begins with a solid circuit board. This is where we add important parts like transistors and diodes. They help change the solar power from direct to alternating current. This is what lets us use solar power in our homes and schools.
Fenice Energy’s guide helps DIY fans to make solar panels as good as any pro’s. By using advanced materials, you can customize your panel. This lets you harness solar power effectively.
In India, making solar cells at home is more than a hobby. It’s a step towards using clean energy and being self-sufficient. Fenice Energy supports this shift. We’re excited to see homemade solar panels become a reality for many people.
Wiring and Electrical Configuration
Making a solar panel right means nailing the electrical setups. This step is key to catching and using solar power well. At Fenice Energy, they’re all about clean energy. They stress the need to get solar panel soldering just right because it really holds everything together.
Soldering Bus Wires and Tabbing
Soldering bus wires onto solar cell strings is crucial. It connects cells in your solar setup, allowing electricity to flow smoothly. Getting good at putting together tabbing wires is vital. It makes sure every connection is not just strong, but also perfect for moving solar energy efficiently.
Tabbing wires need careful cutting and soldering for the best contact and least resistance. The solar panel’s performance largely depends on using top-quality materials and precise assembly techniques. Fenice Energy gets this. They aim to make solar energy accessible, offering detailed guides and professional tips.
Securing and Testing Electrical Connections
After connecting tabbing and bus wires, they’re checked thoroughly. This includes making sure extra wires are well placed and testing the solar panel’s electrical functions outdoors to find the exact voltage and current across different setups. Ideally, a homemade solar panel should give about 18 volts and 3.5 amps, showing you did a great job with bus wires, tabbing, and aligning 9 solar cells.
To add some context, here are some facts:
- A single-junction silicon solar cell usually produces about 0.5 to 0.6 volts when open to air.
- In 2020, the cost of setting up big solar projects in the U.S. dropped to INR 70.91 per watt, much less than in 2013.
- Community programs like Solarize help spread solar panels by using group buys to get better prices. This makes it easier for families to start using clean energy without worrying about big upfront costs.
Furthermore, for Fenice Energy, it’s not just about building a solar panel. It’s also about making sure it meets standards. The process to validate your solar panel in India is critical. This thorough check ensures your solar panel setup meets international standards and will work smoothly for years to come.
Mounting Solar Cells to the Panel Backing
Mounting solar panel cells correctly is key to their performance and lifespan. By using steps outlined by Fenice Energy, your solar panels can reach their best output. This ensures your solar setup works well for a long time.

Start by laying out the cells carefully on a pegboard. It’s the board behind everything. How you arrange the cells is important for how much sunlight they get. Make sure no cell throws a shadow on another. They are often set up in a series wiring design.
Use crystalline silicon solar cells for the best efficiency. They’re the top choice and make up 95% of solar cells used in 2021. This choice matches the latest tech trends and ensures reliability.
Before securing the cells, drill small holes for wiring. Then, glue the cells to the pegboard with a strong outdoor adhesive. After, let it dry well. For extra hold, you might add a frame or clamps. This helps the cells stay in place during drying.
Solar panels play a big part in using renewable energy and cutting down greenhouse gases. Below is a table with steps for properly fixing and grounding solar cells:
| Step | Process | Details |
|---|---|---|
| 1 | Layout Planning | Follow a detailed plan for arranging your cells and pegboard. |
| 2 | Drilling for Wiring | Drill holes that fit the wire size for connecting the cells. |
| 3 | Gluing Cells | Choose an adhesive that is UV-resistant and weatherproof. |
| 4 | Securing Cells | Keep cells in place with frames or clamps until the glue dries. |
With Fenice Energy’s expertise in clean energy, these tips are top-notch for solar cell mounting. Careful work can make your solar panel last and perform well. It shows how with effort, you can achieve efficiency and sustainability Fenice Energy supports.
Encapsulating the Solar Panel for Durability
Making solar panels last longer starts with a special process called encapsulation. This protects the panels from harmful elements. A DOE SETP PV Program reviewer in 2006 mentioned, “Packaging is the predominant cause of failure in modules.” This highlights the need for strong coatings to keep solar panels working well. Fenice Energy points out how vital this is from over twenty years of experience.
Applying Protective Coatings
To shield solar panels, protective coatings are crucial. They fight off damage from things like weather. For over 20 years, a material called ethylene-vinyl acetate (EVA) has been widely and affordably used for this. Other materials like TPU, PVB, silicones, and UV-curable resins are also options, matching different needs for durability and performance.
Adding these protective layers helps the panels avoid wear and tear from temperature changes and pollution. The Accelerated Life Test (ALT) shows how well EVA can handle the heat, making sure the panels are ready for outdoor challenges. This step is crucial for keeping solar panels in good shape for a long time.
Adding Plexiglass and Sealing Edges
After sealing the solar cells, we add a see-through plexiglass layer on top. This layer keeps the cells safe while letting light through. Plexiglass also keeps the solar panels looking good.
Sealing the edges with the right materials is another important step. Materials like TPT-primed and PET-based backsheets make the panel stronger and keep moisture out. These steps help make a reliable solar panel, perfect for consumers in the INR market who want their solar investments to last.
| Encapsulant Type | Properties | Suitable Applications |
|---|---|---|
| EVA | Cost-effective, proven reliability | Standard solar panels |
| EPE | High-efficiency, moisture-resistant | Glass-Glass Panels with PERC, TOPCon |
| TPU, PVB, Ionomer | Flexibility, impact resistance | Variable climates and panel designs |
| Silicone/PU Hybrid, UV-Curable Resin | UV protection, enhanced durability | Areas with high solar irradiance |
New materials like EPE, with a POE layer between two EVA layers, are getting popular for high-performance uses. This shows the solar industry’s effort to improve materials for better solar panels. Market insights show Asia Pacific leading in 2022, with Europe catching up. This global move towards better encapsulation means we’re all working towards more efficient, long-lasting solar panels.
Implementing Charge Controllers and Batteries
Deep cycle batteries are essential for storing solar energy. Solar panel charge controllers help manage that power. We will explore how these elements work together for strong solar systems.
Installing deep cycle batteries means they can charge and discharge many times. They usually need about 14 to 14.5 volts to fully charge. A “12-volt” battery will have about 12.7 volts when it’s fully charged, making it a good storage solution.
Solar panels work best in moderate temperatures. At 110 degrees, a 100-watt panel can make up to 83 watts. This energy is then regulated by a charge controller. Most systems need a controller, but very small ones might not.
Fenice Energy offers a wide range of charge controllers. You can choose from simple controls to more advanced MPPT controls. Most of their controllers use 3-stage PWM or MPPT technology. MPPT controllers are highly effective, saving energy and boosting power in larger systems.
- Standard controllers can waste a lot of a panel’s power.
- Controllers protect batteries and manage the power flow to them.
- Equalizing batteries is important and done through the controller.
- Some controllers have extra outputs for small loads like lights.
Modern controllers do a lot more than just handle power. They monitor battery voltage and cut off power to prevent damage. They help keep your solar system running smoothly and safely.
Adding a charge controller and battery to your solar system makes sure it has a steady power reserve. It also safely manages the power from your panels. This reflects Fenice Energy’s commitment to high-quality solar technology.
Combining a charge controller with a deep cycle battery is crucial. It maximizes energy storage and protects your solar investment.
Final Steps: Mounting and Testing Your Solar Panel
Fenice Energy has been with you every step of your DIY solar journey. Now, you’ve reached the crucial point of mounting and testing your solar panel. This step brings you closer to using a renewable energy source. It will help lower your electricity bills and protect the environment.
Ensuring Proper Angle and Exposure
Setting up your solar panel correctly means getting the angle just right for the best sun exposure. In India, solar power capacity hit 81.813 GWAC by 31 March 2024. The right placement is key to a successful solar panel setup. Make sure to adjust the panel’s tilt and direction based on where you are. This is important in a place aiming for 40 GW of solar and hybrid projects next fiscal year, showing how crucial installation is for efficiency.
Troubleshooting and Performance Checks
After you mount the solar panel, assessing its performance is a must. India’s solar sector is growing fast, with 42 solar parks designed to boost solar plant setups. But you still need to ensure your panel works perfectly. Check the voltages and currents to make sure everything’s installed right. Remember, the 2.1 GW of rooftop solar systems in 2018, mainly for industrial use, went through these exact checks for top performance.
Fenice Energy emphasizes the importance of not only installing but also thoroughly checking your solar setup. This level of care is what you see at the Gujarat Hybrid Renewable Energy Park, aiming for 30 GWAC power. It’s about making sure each watt fulfills India’s huge solar energy potential of 5,000 trillion kWh per year.
Here’s an overview of India’s solar energy growth and investment. It shows how committed the country is to harnessing solar power:
| Statistic | Data |
|---|---|
| Installed Capacity (as of 31 March 2024) | 81.813 GWAC |
| Foreign Capital Investment (2010-2019) | ~₹1.5 trillion (US$20.7 billion) |
| Tenders Issued for FY2023-24 | 40 GW |
| Gujarat Hybrid Park (Power Generation) | 30 GWAC |
| Rooftop Solar (2018) | 2.1 GW |
| Solar Lanterns Sold (end of 2015) | ~1 million |
| Solar Photovoltaic Capacity (Concentrated in States) | 90% |
As you take in the view of India’s dedication to solar energy, remember your own project. From large renewable parks to specific capacities like Andhra Pradesh’s 4257 MW and Gujarat’s 7,806 MW, your setup is part of a bigger picture. Fenice Energy is here to support you in this important solar journey.
Conclusion
As we finish this detailed guide, let’s think about the big impact of choosing to build your own solar panel. It’s more than just a personal win or a way to save money. It’s also a big step for helping the planet. Making a DIY solar panel can be tough, but it feels great to finish. This adds to the amazing DIY solar panel accomplishments Fenice Energy supports.
People in India are using crystalline silicon to make a difference. This material is key in creating solar panels worldwide. They’re working towards being energy self-sufficient and caring more for our earth. Starting to build a panel is just the first step. It leads to major solar energy achievements. These efforts fight against problems caused by oil and gas use and harming nature. Your work in making high-efficiency solar panels matters. These panels last a long time and are vital for using cleaner energy.
Fenice Energy has been offering help with clean energy for over 20 years. We see the value of these projects in India. There’s a lot of official support like subsidies and tax breaks for solar power at home or work. It’s time to join the movement. You’ll reduce harm to the environment. Plus, solar energy is still not used much worldwide. Together, we can change that for a better and greener tomorrow.
FAQ
What are the basic materials needed for DIY solar panel construction?
You need photovoltaic cells, tabbing wires, and bus wires for a start. A charge controller, a deep cycle battery, and an inverter are essential too. Don’t forget plywood, a pegboard, silicone or epoxy, and plexiglass for the panels. Tools for soldering and assembly are also needed.
Can I really save money by building my own solar panel?
Yes, you can. Building your own solar panel can cut costs a lot. Commercial panels are pricey. By getting your own materials and working on it yourself, you save a bunch of money.
How do I plan the layout of my solar cells on the panel?
Start by making a template for your cells. This ensures they are aligned and spaced out well. You’ll need to figure out how many cells you need. This depends on your energy needs and the size of your panel.
What safety gear is necessary when assembling a solar panel?
Wearing safety goggles, gloves, and protective clothing is crucial. Be extra careful when soldering and working with sharp tools or glass.
What are the steps involved in assembling solar cells for my panel?
Solder tabbing wires to each cell first. Then, connect them in strings, making sure the polarity is right. Next, link the strings with bus wires. Finally, stick them to a pegboard or backing using silicone or another adhesive.
How do I ensure my DIY solar panel is durable?
Use protective coatings like silicone or epoxy. This shields your panel from bad weather. Covering the cells with plexiglass and sealing the edges adds extra protection.
What is the purpose of a charge controller in a DIY solar panel system?
A charge controller manages the electricity from your panels to the battery. It makes sure the battery charges correctly without overcharging. This is key to making your battery last longer.
How do I test my solar panel after assembly?
Test your panel by checking its voltage and current in open and short circuit conditions. This makes sure it’s making the right amount of electricity and works properly before you set it up fully.
What is the best angle to mount my solar panel?
The best angle depends on where you live. You want to catch as much sunlight as possible. In the northern hemisphere, face it true south. Change the tilt with the seasons for the best results.
Do I need any special skills to build my own solar panel?
Not really. You need basic technical skills, like soldering and knowing a bit about electronics. A good guide and some patience will help a lot too.


